How to Drill into Brick & Mortar (The Ultimate Guide)
The prospect of drilling into brick or mortar can feel like an overwhelming and challenging task at a glance, but with the correct approach and the proper tools, you will surely make light work of it. Of course, many elements must be considered before you go ahead and start drilling away, but in this guide, we will cover absolutely everything you’ll need to pull it off successfully. If you are looking for the ultimate guide on drilling into brick and mortar, then you are going to dig this!
Step 1 – Decide Where to Drill (Brick or Mortar)
“Decide where to drill” might sound daft, but finding the precise spot to drill into brick and mortar is a complex decision that has several factors to be considered. First, you should understand the difference between brick and mortar and how they each react to being drilled into.
- Brick: is a building block material that is used to make walls and other constructions in masonry.
- Mortar: on the other hand, is the bonding agent that is used between blocks.
Now, deciding whether to drill into brick vs. mortar depends on many different factors, i.e., the diameter and depth of the intended hole, what type of brick it is, how old the brickwork is, the anchor and stud type, and the amount of weight being placed on the intended fasteners. More often than not, brick holds a significant amount more weight and provides greater support than mortar. That being said, if you are working with old and fragile brick, then boring deep holes into the material, supporting heavy objects or installing expansion-style anchors might not be the best option for you. You see, the deeper the hole, the more it can weaken brick that is already somewhat fragile. In addition to that, the anchors can form excessive stress on the material and cause cracks to form. So, if you can see that the brick is showing signs of old age, then drilling into the mortar will likely be your best option—or the safest at least. You’ll find that mortar is far easier to drill through given that it is a softer material than brick and in addition to that, it is easier to patch up and repair. Bear in mind that when drilling into mortar using a screw expansion plug or any other type of fastener, it is going to cause the force of the anchor to push against the brick, as opposed to expanding the material. Additionally, mortar cannot withstand the weight of larger objects quite as well as bricks can. In that light, you can see that each of the options have various pros and cons that need to be weighed up before making a final decision. What you should always do is inspect both the brick and mortar carefully so that you can determine how the drilling will impact your project.
Step 2 – Pick the Appropriate Drill & Drill Bit Size
Next up, you’ll want to make sure that you are working with the appropriate drill and drill bit. Carefully selecting this can help to prevent you from cracking or causing irreparable damage to the material. When boring into a brick wall, you are going to need something with a bit more oomph, than your standard drill bit for penetrating wood.
Hammer Drill (The Tool of Choice)
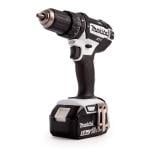
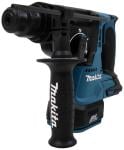
A hammer drill such as the Hitachi DH40MC is without question the perfect power tool for drilling into brick and mortar, especially if you require bigger cuts. The tool functions as a hammer/drill hybrid, forcing hammer-like movements into the material with enough force to penetrate concrete and cinder block as well. A hammer drill has two primary actions: the hammering as mentioned above which breaks through the material, and then the drilling which removes the debris from the boring hole. There are two different types of hammer drill:
- Standard: hammer drills are the go-to power tools for producing holes that are ½ an inch or smaller.
- Rotary: hammer drills, on the other hand, are suitable for drilling holes that exceed ½ an inch.
Understanding the difference between the two and how to properly drill into brick and mortar with a hammer drill will allow you to work safely and with precision.
The Drill Bits (Accessories for the Task at Hand)
And of course, you are going to need the correct drill bit, installed before you make a start on the drilling. The purpose-designed drill bits for brick or mortar are called masonry bits, which include hammer and rotary options. Check out this masonry drill bit – Armeg S28.0X450 You’ll need to consider the ideal size of the masonry bit for it to be well-suited to the hammer drill and the job at hand. Masonry bits have exceptional power when breaking up masonry and the hard-cutting tips are specially designed for chewing through rougher material with relative ease. You can even attach drill bits that are shaped like reversed arrowheads which are larger at the tip giving them an advantage when cutting through the denser materials.
Step 3 – Choosing the Optimal Location to Drill (To Maintain Structural Integrity)
Whether you have decided to drill in brick or into the mortar, you’ll need to find the optimal location for placing the hole. For example:
- When drilling into a brick, you must select a spot that is going to minimise any cracking for a solid mount (i.e., the centre of the brick is going to be more structurally sound, as opposed to randomly boring into the upper right corner without consideration).
- When drilling into mortar, identify a similarly steadfast location; drilling incorrectly is going to cause damage to the wall and even potentially the drill itself.
Let’s take you through a step-by-step guide for drilling into brick, and then again with mortar…
Drilling into Brick:
- First, you’ll want to measure the length and width of the securing device. This will help you identify the perfect drill bit size. Make sure that you drill a hole that is slightly bigger than the width of the securing item.
- Following that you’ll need to attach your chosen masonry drill bit to your hammer drill, a great choice would be any bit from the Bosch SDS+ 8pc set. You want something that can easily handle the density of solid brick. Don’t forget to set the stopper on your hammer drill so that you avoid going too deep and overshooting the mark.
- Now, using a pencil or some chalk, you need to mark precisely where you plan to drill. *IMPORTANT NOTE* - Do not drill unless you are certain that there are no electrical wires or other obstacles in the way (e.g., rebar).
- Do not commence any drilling unless you have the appropriate safety gear on (PPE), such as your goggles, gloves, and a respirator. Putting your health at risk over something as silly as ‘not needing’ safety gear is incredibly daft—but we don’t need to preach to the choir. You know the drill (pun intended).
- Begin by drilling a pilot hole using your masonry bit. Next, attach a larger drill bit to make the hole slightly bigger. Always ensure that the hammer drill is perpendicular to the brick wall (a straight line at 90°).
- Remember that drilling through brick and mortar is going to put a great deal of stress on the drill bit and subsequently heat it significantly. Simply cool the bit off by dipping it in cold water—whilst avoiding getting the tool itself wet.
- Don’t panic if your drill bit gets stuck whilst you are drilling into brick and mortar. Simply pause, and switch to reverse mode. *PRO TIP* - You can remove the excess dust and debris by pumping so compressed air into the hole.
- Once you have inserted an anchor or fastener into the hole, you’ll want to seal any openings using putty. Gently slide or tap the anchors into place using a hammer.
- Next up you should replace your masonry bit with a typical screwdriver bit so that you can screw into the anchor whilst leaving enough space to hang your desired object (if necessary).
- Finally, once you’ve completed the installation, it is good practice to go through the Jobsite and clean up the dust and debris thoroughly.
Drilling into Mortar:
Drilling into the optimal mortar location is not so dissimilar to working with brick:
- Mark precisely where you plan to drill with a pencil or a piece of chalk.
- Next, you’ll need to select the appropriate bit, based on the quality of the mortar:
- A precision bit is suitable for working with cured mortar.
- A standard masonry bit is suitable for drilling into fresh mortar.
- Don’t forget your PPE! Safety first ladies and gentlemen.
- Following that, hold the power tool up against your mark and gently push the trigger to establish a clear starting point. Slowly increase the pressure on the trigger until you’ve reached your optimum steady drilling pace.
- Now that you’ve reached your perfect depth, stop (again, some quality hammer drills have a depth gauge or stopper so that you can either see precisely what your depth is or simply have the tool stop the moment it reaches a pre-set depth.
Remember, understanding where exactly to begin drilling into both brick and mortar is crucial in ensuring that you do not split the surface. Take your time and examine the structure for any signs of erosion, fractures, or weak spots that might easily crumble during the drilling process. TAKE YOUR TIME! You’ll thank yourself for it when you pull it off without a hitch.
Step 4 – Have All of the Required Tools On Hand (Preparation 101)
Of course, depending on the type of surface that you are working with, the tool itself and bit size required will vary (as mentioned above). But you’ll need more than a hammer drill and a selection of different drill bits on hand when boring into brick and mortar… When choosing the appropriate hammer drill (other types of drill may be suitable, provided they have a hammer function), you have other factors to take into consideration. Specific features such as variable speed, powerful torque options, and a depth setting will certainly give you an advantage. Just be sure not to waste your time with any drill bits other than masonry or mortar drill bits. These can penetrate brick and mortar with ease. Make your job as easy as possible by selecting the purpose-made tools, trust us on that. But again, aside from the hammer drill and your masonry bits, you’re going to need a few extra bits to make the drilling process easier:
- Compressed air (ideal for clearing out excess dust and debris).
- Cool water (for when your drill bit invariably heats up and needs a breather).
- Dustpan (because you don’t want to leave the Jobsite in a state when you move on).
- Pencil/chalk (to mark precisely where you aim to drill).
- Putty (for filling in any gaps when securing your anchor etc.).
- Vacuum/hoover (clearing up excess debris).
- Tape measure (for measuring the length and width of the target area).
- Wall anchor (for securing any objects you plan to hang).
- Tape (to place around the area you need to stop if using a regular drill).
If you plan to drill into brick without a hammer drill, it isn’t quite as easy, though it is certainly doable. That said, drilling into a brick wall using a regular drill is going to require a high-quality masonry drill bit to get the job done. You see, without the hammer action provided by a hammer drill, the tool is going to rely heavily on the turning speed. This process will take longer and you will need to remove the drill from the boring hole more regularly to prevent overheating (again, using cold water every time).
Step 5 – Following the Appropriate Safety Measures to the T (No Unnecessary Risks)
Whenever you are operating heavy power tools, your safety should always be your number one priority. By following the appropriate safety procedures, you’re not only protecting yourself but other workers in your vicinity.
- Goggles
- Protective earmuffs (some hammer drills are louder than others)
- Gloves
- Respirators
Below are some additional health & safety tips to consider whilst drilling into brick and mortar:
- Apply the Appropriate Pressure: Operating a hammer drill is easy enough, provided you allow the power tool to do most of the work for you. Apply too little or too much force is a sure way of causing the drill to slip. Find your groove and apply a medium amount of pressure to maintain control.
- Avoid Baggy Clothing: Long hair, loose fabrics & straps, and jewellery are unnecessary hazards when operating power tools. If the drill catches any of these loos items, you’re going to find yourself wrapped up in an awful mess.
- Drill Pilot Holes First: Driving a pilot hole first will make it easier for you to insert larger bits and thus increase the overall accuracy of your straight drilling. Once you have a pilot hole in place, you’re not going to have to apply excessive pressure and thus reduce the odds of your drill bit slipping.
- Carefully Set the Drill Bit: Fasten and secure your drill bit into the drill’s chuck, ensuring that it is nice and tight before you do anything.
- Utilise a Centre Punch: Using a centre punch will create a handy indentation, thus giving you an easy target once you commence drilling.
- Use a Drill Stand if Necessary: Using a stand can help you to guide your tool into the hard materials such as brick or mortar, whilst creating straight holes absent slipping.
- Only Work with Secured Materials: Clam the brick where necessary using a vice so that it doesn’t shift and slip when you are drilling.
- Wear Your PPE: That’s right, we’re going to keep hammering the whole health & safety malarkey home so that you don’t forget! Keep yourself safe from unnecessary injury—particularly if you enjoy having good eyesight and all of your extremities intact.
- Inspect & Maintain: Keep on top of your tools with regular inspections and maintenance where necessary. If you are lax on this, then you are asking for trouble. A good workman never blames his tools; a great workman never needs to, as they’re always in excellent working condition.
Step 6 – Never Drill Too Deep (Measure Accordingly)
Drilling too deep into any material will cause unnecessary complications. But when you drill excessively deep into both brick or mortar, you can affect the integrity of the anchor and screw. Deeper holes are also much harder to fill if you make a mistake and wish to remove whatever you have been hanging there. You must avoid drilling too deep and should always confirm that there is nothing behind the wall, just in case. If you hit electrical wires, pipes, plumbing, and conduit, then you’re going to have a nightmare on your hands. You should also consider using various drilling fluid additives. This allows you to lubricate the tool sufficient to lessen the amount of vibration coming through the hole. Remember, when you drill deeper holes, there is a much higher chance of deviation. This should be avoided at all costs if you wish to avoid expensive and time-consuming repairs. An easy way to identify precisely how deep you can drill is by measuring the width of the wall that you are targeting, and the length of the anchor and screw that you plan to insert (and again, confirming that there is nothing in your path). Once you have your precise depth, set your depth gauge on your hammer drill (another good reason to invest in the highest quality power tools). Should you decide to use a regular drill, then you must measure the drill bit and then place tape on the drill bit marking precisely where you need to stop.
Step 7 – Seal the Holes Using Putty (For Aesthetic and Structural Purposes)
Once you’ve finished drilling a hole, inserting your anchor, and installing a screw, you should seal any of the openings using putty or mortar. When you patch up any small gaps and holes, you will strengthen the overall hold of whatever it is that you plan to hang on the brick wall.
Step 8 – What’s the Rush? (Take Your Time)
Even if you are on a tight schedule, rushing into something like drilling into brick or mortar will only likely end up in you making costly mistakes, and thus putting you even further behind schedule…take your time!
- Understanding how to drill into brick without it cracking is crucial when producing functioning holes with structural integrity.
- If you drill too fast, then you might damage the surface and thus create a massive safety hazard.
- When you start each new hole, take your time to align your hammer drill perfectly with the pre-marked location.
- Be sure to hold the tool firmly to prevent it from skipping or jolting back on you. If you do not hold on with enough security, the drill can easily move out of place and subsequently create the wrong sized cut.
- Remember, take your time and drill a few seconds at a time at first to form a suitably sized hole. Following that you can begin to increase your speed incrementally.
- With the right amount of pressure, the drill bit will remain in place and take care of the hard work for you.
- With too much pressure and speed, you can cause it to veer and overheat.
- Now that you’ve taken the time to make your pilot hole, you can use a bigger pit to perform the next stage.
- Extract your bit from the hole periodically and clear all of the debris and dust using your compressed air. This will make sure that your drill bit won’t get stuck.
- By drilling slowly and steadily, you’ll reduce the number of times that you’ll have to pull out and cool the drill bit down.
- Be patient! Rushing a job like this is an easy way of bungling everything and creating yet even more problems for yourself.
The Takeaway (Choose the Right Tools for the Job)
So, now that you have a comprehensive step by step guide on how to effectively drill into brick and mortar, it is time to gear yourself up with the appropriate equipment. At Data Power Tools, we have a wide and extensive range of incredible power tools available from some of the hottest manufacturers in the industry. We are here to help you every step of the way, so feel free to browse our selection and should you get stuck or have trouble finding a specific tool, please do not hesitate to contact us today. Happy drilling!


