A Beginners Guide to Installing Plasterboard
Posted on 29/03/24
Plasterboard consists of large, firm panels used to cover the interior walls of both residential and commercial buildings. This method of constructing walls doesn't require the use of mortar or plaster. Whether you're looking to expand your living space or undertake a full-scale renovation, installing plasterboard against the structural studs of your property is essential. While professional assistance is available, the process of installing plasterboard is straightforward enough for a DIY project. This cost-effective material is forgiving; errors are easily rectifiable. However, you'll need more than just the plasterboard panels to complete the task effectively.
By following our guide on how to install plasterboard and incorporating expert advice, you can ensure your project, be it an addition or a remodel, is executed flawlessly.
Essential Materials and Tools for Installing Plasterboard
Below is a comprehensive checklist of materials and tools essential for installing plasterboard:- Plasterboard Sheets: Select panels with dimensions that minimize visible seams in the final installation. The thickness should match the project requirements—quarter-inch panels for curves and arches, three-eighths for overlaying existing walls, and the standard half-inch for most applications.
- Safety Glasses: Protective eyewear is crucial to shield your eyes from dust. Opt for tinted versions for outdoor work.
- Dust Mask: A mask is necessary to protect against inhaling fine particulates.
- Tape Measure: A minimum 12-foot tape measure is required for accurate measurements of plasterboard sheets.
- Plasterboard T-Square: Use this L-shaped tool for precise cuts, essential for ensuring straight edges. A standard size is 48 inches, suitable for full-sheet lengths.
- Utility Knife: Essential for scoring plasterboard, providing a guide for clean breaks.
- Plasterboard Knives: These tools come in various widths for spreading joint compound over seams effectively.
- Corner Plasterboard Knife: Designed with a 90-degree angle for applying mud efficiently into corner seams.
- Jab Saw: This serrated tool is ideal for puncturing initial holes in plasterboard panels.
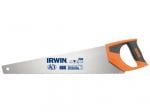
- Plasterboard Saw: A specialized saw for intricate cuts in plasterboard, featuring a long, thin blade.
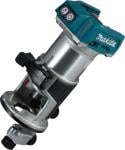
- Cordless Plasterboard Screwdriver: A tool that offers precision and speed, making screw attachment efficient.
- Plasterboard Screws: These are used to firmly attach plasterboard panels to studs, available in lengths suited to your panel thickness.
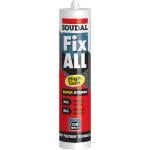
- Plasterboard Adhesive: Enhances panel attachment to studs, providing additional support.
- Plasterboard Tape: Paper or mesh tape to cover the joints between panels.
- Lightweight Joint Compound: Preferred for its ease of sanding, ideal for repairing cracks or as a final coat.
- Setting-type Joint Compound: Best for filling larger gaps and sealing areas where panels don’t meet perfectly.
- Stain-blocking Primer: Applied post-final coat to prevent stain penetration and paint bleed-through.
- Mud Pan: A stainless steel tray for holding and managing joint compound.
- Sanding Tools: Including plasterboard sanding sponges for detail work, sanding blocks for smoothing seams, a pole sander for high areas, and a corner sander for tight spots.
- Plasterboard Lift: For solo projects, this tool is invaluable for positioning plasterboard panels correctly.
Installing Plasterboard Made Simple
Installing plasterboard is a relatively quick process, especially with assistance from friends or family. This detailed guide will walk you through the plasterboard installation process for your DIY home renovation.Ceiling Plasterboard Preparation
- Start by measuring and marking the ceiling plasterboard. For smaller areas, a single 12-foot plasterboard sheet might suffice, but larger spaces may require more. Follow these steps for precise cutting and measuring of ceiling plasterboard:
- Begin by measuring from a corner at a 90-degree angle to the joists, the horizontal supports across load-bearing walls, to determine the placement of the first panel.
- If a panel doesn't span the entire ceiling length, ensure it terminates at a joist's midpoint. For boards not reaching a joist, measure to the midpoint of the nearest support it overlaps and mark these measurements on the panel's edge.
- Use a plasterboard square as a guide to score along the marked line with a utility knife. Then, snap the surplus part off by bending the plasterboard over your knee.
- Mark the locations on the top plate where joists meet the wall to know where to drive screws into the plasterboard panels.
Ceiling Plasterboard Installation
With the placement for the panels determined, you're ready to affix them to the ceiling. Here's how to proceed with installing plasterboard overhead:- Begin by using a plasterboard lift or getting help to hoist the first panel up to a corner of the ceiling. Make sure the panel's edges align at right angles to the joists and that it sits flush against one side of the wall.
- Once the panel is properly aligned, fasten it with five screws spaced evenly along a line that runs through the middle of the panel and into the nearest joist.
- Refer to the marks you made on the top plate to ensure screws are correctly aligned, confirming each screw is positioned at least half an inch away from the panel's edge. The screws should be driven in to dimple the plasterboard surface without tearing the paper.
- Continue this process, placing a line of five screws into every joist contacted by the plasterboard panel, all the way to the panel's end.
- Start another row of screws, maintaining a few feet distance from the initial row, to ensure stability. Place an additional screw beside any that has penetrated too deeply, compromising the plasterboard paper.
Sizing and Trimming Plasterboard for Walls
After the ceiling is complete, shift your focus to preparing the plasterboard for your walls. Here's how to accurately measure and cut panels for wall installation:- Start by measuring the width of your wall. Trim the plasterboard sheet to be roughly a quarter-inch less than your measurement for a precise fit.
- With the help of a lift or another person, raise the plasterboard until it's snug against the ceiling.
- Use a utility knife along with a plasterboard square to score your measured line, then break off the surplus portion cleanly along this score.
Mounting Plasterboard on Walls
When attaching the cut plasterboard panels to your walls, apply plasterboard adhesive along the studs to minimize the need for screws, which also aids in soundproofing your rooms. Here's how to proceed with wall panel installation:- Before fitting the plasterboard, check that the first panel will align with the centre of a stud—the vertical supports in the wall structure. Trim the panel if necessary to ensure it centres on a stud.
- With assistance or using a lift, position the panel so that it closely meets the ceiling panel above and aligns flush with the wall beside it.
- Begin by inserting plasterboard screws at a manageable height in the middle of the panel.
- Continue placing screws, starting from the middle and working outwards, to evenly distribute them.
- Space the screws uniformly as you fasten them across all the studs encountered by the panel.
- For optimal coverage and to limit the use of adhesive, install the plasterboard horizontally, ensuring the seam is easily accessible. Should the panel not fully span the wall, you may require additional sheets to complete the coverage.
Creating Openings for Doors, Windows, and Electrical Boxes
Your space likely includes doors, windows, and the need for access to electrical outlets, necessitating precise cuts in the plasterboard. Here's how to manage these requirements: For areas where windows are yet to be installed:- Position a plasterboard panel over the intended window location, securing it temporarily with screws to outline the window's corners.
- Employ a jab saw to initiate a cut at the centre of this marked area, proceeding both sideways and vertically to outline the window precisely.
- Remove any surrounding trim and prepare the plasterboard panel by cutting out the window section before it's mounted.
- Align the panel near the floor to mark the lower boundary of the window, then measure upwards from the ceiling for the top boundary, marking both on the plasterboard.
- Cut along these marks to create the window opening, then secure the panel in place.
- Similar to window cuts, align the plasterboard against the door frame minus any trim, marking the position of studs and the top edge of the door before cutting.
- Use the jab saw to make the door cut out, then fasten the cut panel.
- Mark the outlet box's height from the floor on the plasterboard.
- With the power safely off, attach the plasterboard over the box location.
- Identify the box's edges by puncturing the plasterboard with a jab saw, then cut outwards to expose the outlet.
Attaching Plasterboard at Corners
Securely fastening the plasterboard at both the interior and exterior corners is crucial. Here’s how to effectively manage this:- Begin with the installation at the lower part of the wall, opting for a shorter plasterboard piece to avoid alignment of seams directly above the other.
- Position this initial panel accurately and affix it with screws.
- Follow with a longer panel, ensuring the shorter piece is already securely mounted.
- Maintain a small separation between the plasterboard and the floor to dodge any irregularities on the surface. This gap, which can be about a half-inch, will later be concealed by the skirting board. Trim the panel as needed to achieve this spacing.
- Extend a piece of plasterboard past the corner for precise fitting.
- Once placed correctly, trim the excess using a jab saw to ensure a snug, accurate corner fit.
- When dealing with interior corners, ensure the plasterboard pieces are closely fitted without being forced too tightly, which could lead to damage. A slight space, roughly an eighth of an inch, between panels is advisable as it will be filled during the mudding process.
Applying Final Layers of Joint Compound
For joint finishing, prepare a supply of lightweight joint compound in your mud pan, ensuring there's enough to cover the framing area you're addressing. Start with the horizontal seams for optimal outcomes, proceeding to other areas thereafter.- Smoothly spread the joint compound over each seam's entire length using a plasterboard knife, applying evenly to fill any gaps and create a level surface across adjacent boards.
- While the compound is still moist, position the joint tape over the seam, leaving a small gap at intersections.
- With a broader knife, overlay the tape with more compound, levelling it consistently with the wall surface.
- In corners, opt for a metal or fiberboard corner bead for durability, applying it over the initial coat followed by a secondary layer of compound.
- Address screw indentations by filling them with compound, letting the seams set as per the manufacturer’s guidance.
- Allow the compound to dry fully, turning a solid white, before applying a final, thin layer over all seams and corners. Reapply over any areas surrounding repaired screw heads as well.
- Once the finishing coat dries, inspect the walls with your knife for any unevenness or gaps, filling them as necessary with more compound.
- Sand down the joints until smooth to the touch, ensuring no flaws are felt.
- Following sanding and necessary touch-ups, the walls are ready for primer application, followed by painting.
Pro Insights for Plasterboard Installation
Mounting plasterboard is a straightforward task suitable for DIY enthusiasts at all skill levels. To achieve results indistinguishable from professional workmanship, consider these expert guidelines.- Ensure Framing is Level First the framework supporting your plasterboard — whether for walls or ceilings — must be uniformly level across all supports. Discrepancies in framing can cause the plasterboard to warp, creating unattractive distortions or cracks.
- Horizontal Installation of Panels For wall additions, position the panels horizontally. This method not only reduces the number of seams needing finishing but also enhances the structural integrity of the wall, safeguarding against environmental and physical damage. Utilizing 12-foot panels could eliminate vertical seams in certain areas.
- Marking Stud Locations with a Chalk Line Initially, you might mark the studs' centerline on the floor and ceiling with a pencil. This aids in evenly distributing screws when securing the panels.
- Breaking Rather Than Cutting Panels Achieve clean breaks by scoring one side of the plasterboard with a utility knife, then bending the panel over your knee to snap it along the scored line. Refine the cut by slicing along the fold from the opposite side.
- Selecting Suitable Screws Opt for coarse-threaded screws, which provide better grip than fine-threaded alternatives, matching the length to your panel's thickness. For standard panels, 1 1/4-inch screws are ideal.
- Efficiently Cutting for Electrical Access Measuring and marking the plasterboard for any obstructions like outlets requires precision, yet can be time-consuming. A swift method involves using a chalk line to outline each box's perimeter, and then cutting the plasterboard accordingly.


